Tips for Replacing a Leaky Toilet
3/19/2018 (Permalink)
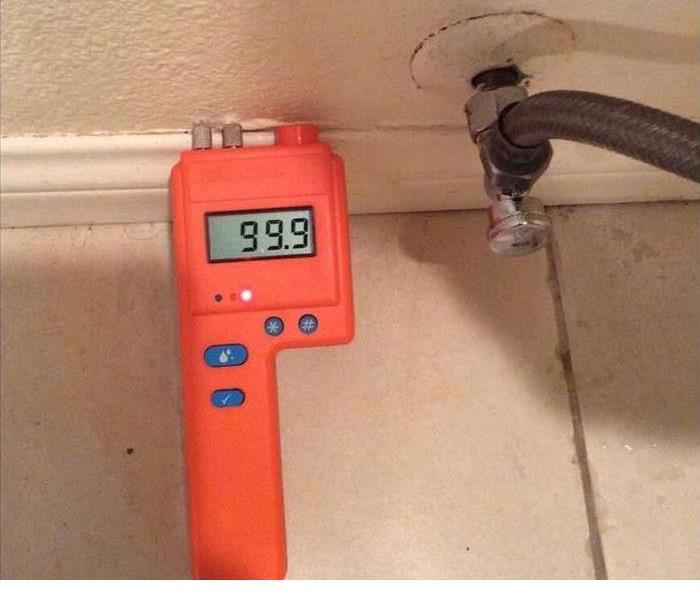
 Here you can see that one of our technicians is in the process of checking moisture levels in this wall.
You may not think about your Spring Valley, CA home's plumbing while you shower, do dishes or run your washing machine. However, it can be one of your home's most vital systems, and when something goes wrong, such as a leaking toilet, the results can be messy and expensive. If a toilet cannot be repaired, the next best option might be to replace it yourself.
1. Check the Seal First
If you have an old toilet, the leak might be due to a broken seal where the unit meets the floor. This type of leak can be quite common and cause water to spill out onto the floor when the toilet is flushed or filling. To check for this type of leak, dry the floor around the toilet and the base, then flush the unit. If you see water leak from the seal, then you may want to consider upgrading your toilet and making a new seal.
2. Remove the Toilet
Once you have determined you need a new toilet, the next step in this process is to remove the old one. First, turn off the water to the unit and then empty the tank and bowl as much as possible to prevent the water from sloshing out when you move the toilet. Disconnect the water and then unscrew the bolts from the base of the toilet before gently lifting the leaking toilet and undoing the seal. You may want to have a water removal and restoration company come in at this point to ensure no lasting water damage has been done by the leak.
3. Install a New Unit
Once you check the toilet's flange for signs of wear, you can complete your toilet repair project by installing the new unit. Remember to create a good seal by pressing down firmly on the toilet's bare rim. Once the new toilet is in place, you can turn the water back on and check if the problem is resolved.
A leaking toilet in your Spring Valley, CA home can cause a considerable amount of water damage. However, knowing the steps to replace it quickly can save you time and money. Visit http://www.SERVPROspringvalleyjamul.com for more information on water damage.


 24/7 Emergency Service